Months ago...


After I've made so many sandwich loaves and have achieved a certain standard of quality, my husband now pushes me towards a higher level of excellence. He made a suggestion for serving the bread warm. This means my new challenge is on rolls that can be baked right before dinner. Rolls need to have lower hydration in order to hold their shapes. Here is my first attempt. As usual, the first attempt usually isn't the best-quality product. The taste of this one is very good, though.

Recipe: Beer cheese dinner rolls (make 4)
Ingredients:
roux
- 1/4 cup + 2 TB guinness beer
- 2 TB King Arthur all purpose flour
dough
- 1/4 cup King Arthur all purpose flour
- 1/2 cup whole wheat flour
- 1/2 tp active dry yeast
- 1/2 tp kosher salt
- 2-3 oz Panduehue cheese, cut into 1/4"x1/4"x1/8" pieces
- 2 tp oil for greasing pan and rubbing on surface
- 1/3 to 1/2 cup warm water
Procedure:
1. Mix the roux ingredients. Heat on med-heat setting and stir frequently until the mixture becomes a paste.
2. Allow to cool down in the pan until the pan is not too hot to the hand. Add the active dry yeast to the roux. Mix very well.
3. Mix whole wheat flour, all purpose flour, salt in a bowl. Add in the roux and mix. Then gradually add warm water by spoonfuls while mixing in the flour. Stop once all the flour has incorporated into a dough. The hydration of the dough should be relatively low. Knead the dough intermittently for about 15 minutes.
4. Work the Panduehue cheese into the dough.
5. Place the dough in a bowl and allow to rise until volume doubles.
6. Cut dough gently into 4 pieces. Do not punch down. Try to preserve as many bubbles as possible. Form balls from each piece.
7. Grease a pan and the surface of each ball generously with oil. and allow the dough balls to rest until the volume doubles again.
8. Gently reshape each ball into desired shape. Do not punch down the bubbles. To save some for future use, wrap up in plastic wrap and chill (or freeze).
9. Allow to rise until baking time.
10. Preheat oven to 450F. Bake at 400F for 10 minutes.
Results:
12:29pm, texture and hydration of the initial dough made use a beer roux:

12:39pm, amount of Panquehue cheese used:

12:39pm, initial dough with cheese worked into it:

12:55pm, final dough prepared to rest in a bowl, in a warm oven:

2:34pm, final dough rested 1 hour and 30 minutes:

2:47pm, dough balls formed by gently cutting dough into 4 pieces without punching down the bubbles:

2:47pm, dough balls initial height:

3:44pm, dough balls risen the 1st time, taking about 1 hour in warm oven:

3:44pm, heights of the dough balls after the first rise:

3:57pm, dough balls reshaped (observe the ample oil used to keep the surfaces from drying out):

3:57pm, dough rolls preparing for the 2nd rise at room temperature:

4:34pm, dough rolls risen the 2nd time, taking about 30 minutes:

4:43pm, half the dough rolls wrapped up and saved for future baking:

4:43pm, half the dough rolls preparing for the 3rd rise at room temperature:

4:43pm, side view of the dough rolls before the 3rd rise:

5:27pm, dough needs extra moistening after 30 minutes of rising:

6:27pm, dough before baking in toaster oven at 400F:

6:47pm, dough baked for 20 minutes at 400F:

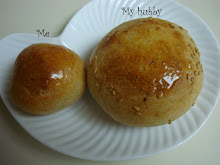
6:50pm, a bit of the freshly baked roll:

Observations:
1. The hydration level of this dough makes it easy to work with when making rolls.
2. The dough rises pretty well with the given amount of yeast.
3. Between the 2nd and the 3rd rises, the texture of the dough has become more and more smooth and elastic. Each time I reshape the dough, I wrap the drier top surface inward into the center of the roll. This may be a good way to keep the rolls' moisture more uniform, as the top surfaces tend to dry out while the bottom surfaces tend to be moist and greasy.
4. The rolls start to have dry skin after resting for a while (especially during the last round of rest). So I need to brush the top with water.
5. There is no noticeable oven spring for these rolls.
6. The rolls have a very nice crunchy crust and a very moist crumb. I do not know if the moist crumb is due to the large amount of cheese or due to insufficient baking time.
7. I'll need to find out how people make those light and fluffy rolls. Is it just the trick of white flour? Or is there more to it?
No comments:
Post a Comment