
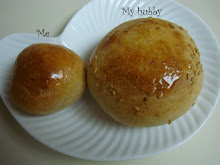
This loaf looks so much like the pacman!

Recipe: Buttery swiss cheese bread (make 1 medium loaf)
Ingredients:
- 1 cup atta flour
- 1+1/4 cup high-gluten flour
- 2 tps active dry yeast
- 3 large eggs
- 5 TB unsalted butter
- 3 once Kiwi swiss cheese
- 1 TB bacon bits
- 1+1/2 tp salt
Procedure:
1. Proof dry yeast in 2 TB water
2. Mix 1 cup of atta flour with 1 tp salt. Add the proofed yeast. Then beat in the eggs and start mixing the ingredients. While mixing the ingredients, add gluten flour in batches of 1/2 cups.
3. When the mixture has formed a dough, add butter in small bits. Rub the butter into the dough. Knead the dough thoroughly.
4. After plenty of kneading, taking about 5 minutes, allow the dough to rest for 5 minutes.
5. Meanwhile, chop the swiss cheese into very fine pieces. Mix with bacon bits and 1/2 salt. Then stretch the rested dough into a sheet. Spread the cheese mix on the dough and roll the mixture in.
6. Keep kneading the dough until all the cheese has distributed uniformly.
7. Allow the dough to rest in a bowl covered with plastic wrap for about 1 to 2 hours, until the dough's volume has doubled.
8. Punch dough down and reshape it into a ball. Allow it to rest on the baking sheet until its volume doubles again.
9. Preheat oven to 375F. Bake for 10-15 minutes, until top is golden brown. Cover with foil and bake for another 25-30 minutes until internal temperature reaches 190F.
Results;
Gluten flour:

12:27pm, adding butter to initial dough:

12:44pm, final dough with 5TB butter, observe how it cleans the hand:

12:46pm, texture of final dough:

12:59pm, final dough before adding cheese:

12:59pm, cheese added to final dough:

1:09pm, final dough after adding cheese:

1:09pm, final dough to rise:

1:55pm, final dough risen 45 minutes:

2:10pm, final dough punched down; observe texture:

2:20pm, final dough to rest the second time:

4:45pm, final dough rested 2 hours and just before baking:

5:06pm, loaf baked 10 minutes uncovered, it's then covered with foil to bake for the remaining time:

5:24pm, loaf baked 18 minutes, internal temperature not high enough:

5:40pm, loaf baked 34 minutes, internal temperature exceeded 190F:

5:41pm, loaf's bottom, amazingly not too brown:

5:41pm, loaf's height:

5:42pm, loaf's opening:

I slice the loaf the next day morning.
Center slice:

End of loaf slice:

Remarks:
1. This is a very greasy loaf.
2. Amazingly, even after baking for 35 minutes, the bottom of the loaf is only deep golden brown!
3. Bernard Clayton recommends this loaf to be frozen and reheated when served. I wrap it tight in aluminum foil and leave it at room temperature overnight to be serve the next morning.
4. This bread has a very strong thick but light golden crust. I think, that's the result of covering the loaf earlier (after the first 10 minutes) and baking for a comfortably long time (35 minutes).
5. The crumb is rather dense for this loaf. This is quite expected because of the shortening effect of the fat content. The long cooking produces a crunchy crust, which is a unique contrast to the softness of the dense crumb.
6. The bread is very pleasant to the mouth. It is the richness of butter. The high fat content keeps the bread from going stale even when left at room temperature overnight.


