
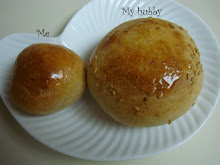

Recipe: Hummus bread (1 medium loaf)
Ingredients:
Dough
- 1 cup King Arthur unbleached bread flour
- 1+1/2 cup King Arthur whole grain flour
- 2+1/2 tps active dry yeast
- 3 TB warm water
- 1/3 cup flaxseeds
- 1 large egg
- 1 TB lemon juice
- 1+1/4 tp salt
- 1 tp sugar
- 1/2 cup 1% milk
- 2 TB olive oil
- 1 TB sesame oil
Hummus
- 3/4 cup cooked chickpeas
- 1 TB lemon juice
- 1/4 tp salt
- dash of cumin powder
- dash of garlic powder
- 1 TB sesame oil
Procedure:
1. To prepare the hummus, use a fork to mince the chickpeas into a paste. Add in lemon juice, salt, cumin and garlic powders. Stir everything in a saucepan on medium heat until the mixture is almost dry. Then add in the sesame oil and mix well to form a smooth paste.
2. Proof yeast in 3 TB warm water.
3. Mix flours, flaxseeds, hummus, sugar, salt, proofed yeast, and egg together. Then incrementally add in the milk, about 2 TB at a time. Mix to form a dough.
4. Once the dough has formed, knead for 5 minutes or until texture is strong. At this point, gluten is developing. Allow dough to rest a few minutes.
5. Add 2 TB olive oil and 1 TB sesame oil. Work the oils into the dough and continue kneading it until all the oils have been absorbed by the dough. At this point the dough becomes silky smooth and soft.
6. Allow the dough to rest until volume doubles.
7. Gently deflate the dough and shape it into a log. Grease a 8"x4.4" pan. Place dough into the pan to proof until its crom is about 1.5" over the rim of the pan.
8. Preheat oven to 350F. Bake on middle rack for 20 minutes. Then cover with foil and continue baking for another 13-20 minutes, until internal temperature reaches 190F.
Results:
11:30am, hummus prepared:

11:30am, yeast proofed:

11:30am, a few key ingredients:

11:42am, initial mixture:

11:47am, initial dough being formed:

11:57am, dough being kneaded 10 minutes on counter:

12:03pm, dough being kneaded 5 more minutes; observe the change in texture:

12:05pm, dough to rest for 2 minutes; observe hands:

12:07pm, dough with oil:

12:17pm, dough kneaded 10 minutes after adding oil, and ready to rest:

12:46pm, dough rested 30 minutes:

1:09pm, dough rested 50 minutes:

1:19pm, dough shaped into a log to proof in greased pan:

1:19pm, dough's height before proofing:

1:39pm, dough proofed 20 minutes on warmed surface:

1:39pm, dough's height after proofed 20 minutes:

1:56pm, dough proofed 50 minutes:

1:56pm, dough's height after proofed 50 minutes:

1:57pm, dough's surface tension:

2:03pm, dough scored:

2:06pm, dough topped with sesame seeds:

2:06pm, dough's height just before baking:

2:20pm, loaf baked 15 minutes uncovered, then covered with foil and continued baking at 350F:

2:45pm, loaf baked 40 minutes, reaching temperature 180F; observe that the loaf is so soft that the thermometer cannot stand by itself:

2:45pm, thermometer coming out clean:

2:50pm, loaf stayed in oven for another 5 minutes:

2:51pm, loaf's height when done:

2:52pm, loaf's temperature when done:

2:54pm, loaf non-sticky, easily sliding out:

2:55pm, loaf's bottom:

2:55pm, loaf's bottom corner:

2:55pm, loaf's top corner:

2:56pm, loaf's side:

2:58pm, loaf's top:

3:42pm, loaf's top after 50 minutes of cooling:

3:42pm, loaf's height after cooling:

3:43pm, loaf's wrinkles when cooled:

5:17pm, slicing the loaf; the crust has hardened up, making the bread hold its shape:

5:20pm, clean knife:

5:22pm, loaf yielding 15 slices:

5:22pm, a center-of-loaf slice; observe that the holes are mostly in the center top part:

5:23pm, a heel-of-loaf slice:

5:23pm, crumb and crust:

This is how I enjoy it for breakfast, with a generous spread of homemade hummus, and then either toasted until the crust is crispy, or eaten just as it is. For this bread, I make the hummus less acidic and a little more salty, without much oil. It's just spreadable. Perfectly simple and perfectly tasty.

Observations:
1. This loaf rises very rapidly, and springs up to an impressive height in just 2-3 hours. However, it also collapses in the oven.
2. It shrinks further when cooled.
3. Once the loaf cools down, the crust hardens, so the loaf starts to hold its shape nicely. The crumb is very soft and light. It is also non-sticky to the knife. So I am surprisingly pleased by the result.
4. The bread has a unique savory taste. Not an ordinary sandwich loaf, but a specialty bread. The chickpea is noticeable, but not out loud. Perhaps it's because of the presence of lemon juice, the loaf has a distinctive sour smell, though it does not really taste sour. The whole wheat flavor is strong as well. The small waxy flaxseeds leave the mouth something to chew on when the bread has already moved towards the stomach. It's definitely a high quality loaf.
5. In terms of texture, this loaf does not have the elastic, tissue-like, crumb that is typical of wheat bread. I think the presence of hummus makes the crumb less elastic.
6. This loaf is comparable to commercial loaves in terms of its texture, softness and lightness. Very interesting. I love it. So does Dough!


