Monday, May 31, 2010

My 44th experiment: Sesame and sunflower seeds bread

Another adaptation of Bernard Clayton's recipe! When I am kneading the dough, the aroma of dark sesame oil is so strong. It also blends rather nicely with cream. This is also a very great success with atta flour.

Recipe: Sesame and sunflower seeds bread (make one 4"x8" loaf)

Ingredients:
- 2+1/2 cup atta flour
- 2 tp active dry yeast, proofed in 2 TB warm water
- 2-3 TB brown sugar
- 1/+1/4 tp salt
- 3/4 cup 1% fat milk
- 2-3 TB heavy whipping cream
- 1 egg, saving about 1 tp of egg white for egg wash
- 1 tp dark sesame oil
- 1/3 cup sunflower seeds
- 1 TB roasted sesame seeds

Procedure:
1. Proof yeast in 2 TB warm water.
2. Mix 2 cups atta flour with salt. Add proofed yeast, egg and milk. Mix to form dough. Use the remaining 1/2 cup of atta flour to adjust hydration.
3. Chill overnight after the dough has formed.
4. Allow the dough to double in volume. Add sunflower seeds after the first rising.
5. Shape dough into a log. Allow to rise the second time.
6. Before baking, brush top with egg wash. Then sprinkle sesame seeds on top.
7. Bake at 375F for 40 minutes.

Results:
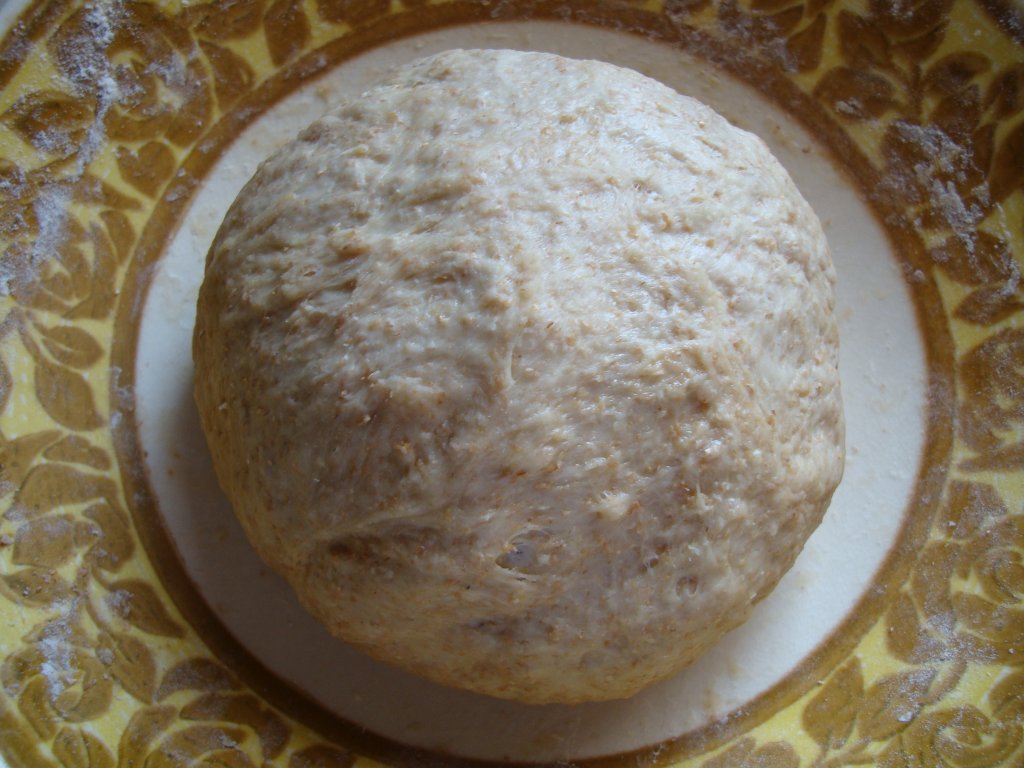
Day 1, 12:48pm, a moist initial dough being formed at a comfortable level of hydration:

Day 1, 1:10pm, dough changing texture with time:

Day 1, 1:13pm, dough ready to rest in the fridge:

Day 2

Day 2, 10:48am, dough taken out of the fridge to warm up at room temperature:

Day 2, 12:48pm, dough risen for 2 hours:

Day 2, 12:51pm, the non-sticky surface of dough even without applying oil (implying an oiled dough):

Day 2, 12:52pm, texture of dough:

Day 2, 12:55pm, dough having been punched:

Day 2, 1:02pm, dough with sunflower seeds worked into it:

Day 2, 1:05pm, dough shaped into a log:

Day 2, 1:06pm, dough ready to rest:

Day 2, 1:06pm, dough's height before rest:

Day 2, 2:19pm, dough risen for 1 hour 10 minutes:

Day 2, 2:19pm, dough's height when risen:

Day 2, 2:24pm, dough brushed with an egg wash of egg white and 1% milk; then topped with sesame seeds:

Day 2, 2:24pm, dough's height just before baking:

Day 2, 2:25pm, loaf pan in oven (with another loaf):

Day 2, 2:36pm, loaf baked 10 minutes, to be covered with foil for the remaining baking time:

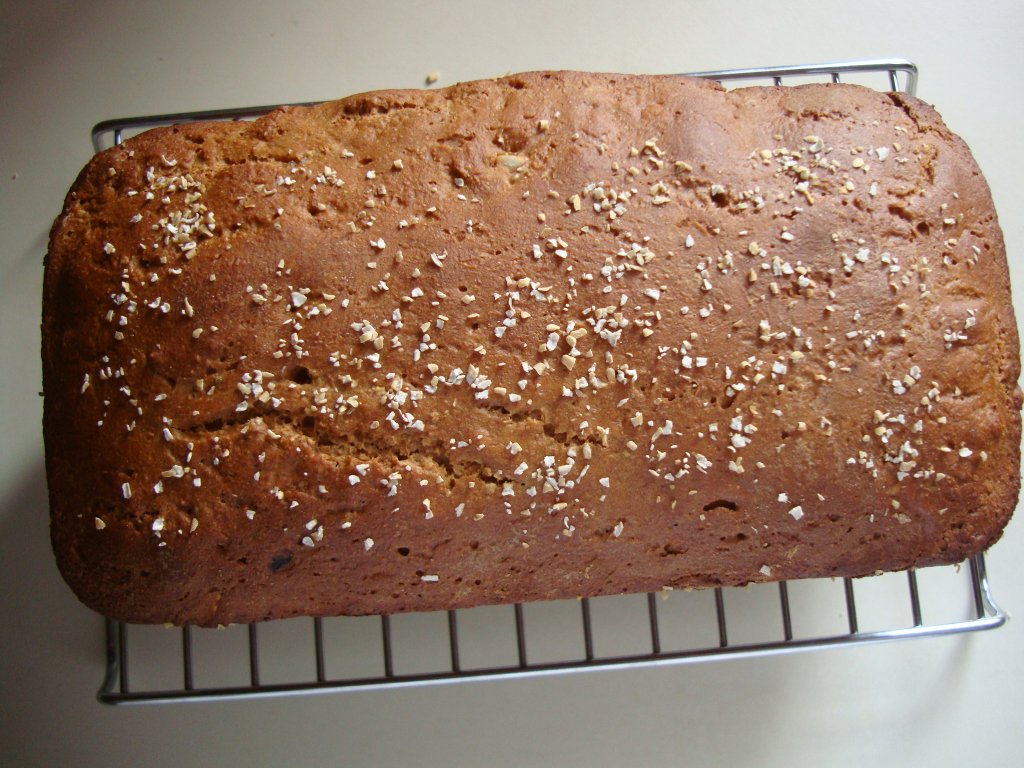
Day 2, 3:04pm, loaf baked 40 minutes:

Day 2, 3:04pm, loaf's striking height after baking:

Day 2, 3:05pm, loaf's internal temperature:

Day 2, 3:06pm, thermometer coming out clean:

Day 2, 3:07pm, loaf's bottom:

Day 2: 3:07pm, loaf's bottom corner:

Day 2, 3:07pm, loaf's top:

Day 2, 3:08pm, loaf's side:

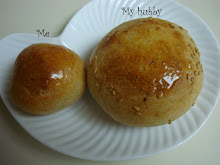
Day 2, 3:30pm, loaf compared with another loaf baked together:


Observations:
1. This time I forget to reduce the amount of yeast used when preparing the dough.
2. While forming the dough, I notice that the dough smoothens very nicely after adding the heavy whipping cream. Since the cream is primarily fat, I drop the 1 TB of vegetable oil from the original recipe after I add the cream.
3. The dough is rather strong, but not too hard to work on the next day. It's pretty good in terms of hydration.
4. The oven spring of this loaf is incredible! Thanks to the 2 tp of yeast with delayed fermentation.
5. The egg wash made of 1 tp egg white and 1 tp milk is a powerful glue. The sesame seeds get firmed stuck on the skin of the loaf even when I bump the loaf and scratch its top against the oven racks.

Pure almond meal shortbread

I am trying to bake some shortbread with almond meal alone. This is what I've got:

Recipe: Pure almond meal shortbread

Ingredients:
- 1 cup almond meal
- 4 TB butter
- 2 TB cornstarch
- 1/2 tp salt
- 2+1/2 TB white sugar
- raw almonds, soaked and sliced for topping

Procedure:
1. Mix almond meal with cornstarch and salt in a medium bowl.
2. Chop butter into small pieces. Use a fork to flake the butter until it forms a smooth paste.
3. Add the softened butter by spoonful into the flour mixture and use hand to mix them together until they are just incorporated to form one ball of dough.
4. Make small 1" balls out of the dough. Press each down into a mini-tart mold.
5. Place a slice of soaked almond on each piece of dough, pressing it down.
6. Preheat oven to 300F. Place the tart tray in the oven and bake at 300F (or slightly lower temperature such as 275F) for 20-25 minutes, until the top is lightly brown.

Results:
4:23pm, shortbread dough ready to bake:

4:54pm, shortbread baked 30 minutes:

4:55pm, shortbread collapsed tops:

4:58pm, shortbread fallen apart when turning out of the pan:

Observations:
1. In this time, the butter and the almond meal dough blend so well that I could knead the dough rigorously. The final dough is very moist and pliable.
2. The greatest surprise comes when after baking for 30 minutes, the puffy shortbread collapses! I think that's because almond meal has no gluten at all. Somehow, it just doesn't hold the puff while baking.
3. This shortbread has a pure taste of almond because no substantial amount of flour is present.
4. After the shortbread has been kept at 150F for a few hours, they harden, but remain chewy.

Remarks:
I've just found out that to make hard cookies, the important thing is to minimize kneading the dough. This can prevent air bubbles from being trapped in the dough. The puff of the cookies during baking comes from such air bubbles. So, the dough should be just incorporated, with minimal handling, if hard cookies are desired.

Almond shortbread with half almond meal

My almond shortbread cookies have been very successful so far. So I am experimenting with variations of it. In this experiment, I increase the almond meal to flour ratio to 1:1 without changing any other ingredients.

Recipe: Almond shortbread with half atta flour and half almond meal (this recipe makes double portion size)

Ingredients:
- 1 cup Trader Joe's almond meal
- 1 cup Golden Temple atta flour
- 4 TB cornstarch
- 1 tp table salt
- 12 TB butter
- 2 TB dark brown sugar
- 3 TB white sugar
- raw almonds, soaked and sliced for topping


Procedure:
1. Mix flour, almond meal, cornstarch, sugars and salt in a medium bowl.
2. chop butter into small pieces. Use a fork to soften the butter, until it forms a smooth thick paste. 
3. Add the softened butter by spoonful into the flour mixture and use hand to mix them together until they are just incorporated to form one ball of dough. 
4. Make small 1.5" balls out of the dough. Press each down into a mini-tart mold.
5. Place a slice of soaked almond on each piece of dough, pressing it down.
6. Preheat oven to 300F. Place the tart tray in the oven and bake at 300F (or slightly lower temperature such as 275F) for 20-25 minutes, until the top is lightly brown.
7. Allow to cool in oven for several hours so that the shortbread becomes crispy.

Results:
3:33pm, soft and moist final dough:

3:43pm, dough balls ready to bake:

4:03pm, shortbread baked 20 minutes:

4:18pm, top of the shortbread:

4:18pm, side of the shortbread:


Observations:
1. For some reason yet unknown to me, the dough becomes really easily incorporated in this dough. In fact,  because of such ease, I knead the dough rather rigorously for a while.
2. Eventually, the dough is so soft and pliable that I decide to chill it for a while before molding into dough balls. 
3. When just baked, the resultant shortbread seem to be softer and more puffy than my previous experiment with only 1/3 almond meal. I continue keeping the shortbread in the oven at 150F. After an hour or two, it has hardened completely. With longer low-heat baking, the shortbread also becomes darker in color.


This experiment makes me wonder how the ingredients affect the characteristic of the shortbread or cookie. Then I find some helpful resource (source: Understanding Food, Principles and Preparation, reporting results from: Fine cooking, 1998)

For puffy, soft, pale cookies:
cake flour (low protein, acid) gives more steam and puff, ; less browning
shortening (high melting point) gives less spread
all brown sugar (hygroscopic, acid) gives soft and moist; less spread when used with egg
egg gives moisture for puff; less spread with acidic ingredients
For thin, crisp cookies:
all-purpose flour (high protein) gives browning
butter (protein) gives more spread; browning
baking soda (alkali) gives browning
corn syrup (glucose) gives browning; crisp
white sugar (sucrose) gives crip
no egg gives no puff; more spread

Saturday, May 29, 2010

Bernard Clayton's insight on dough

It's so very entertaining reading Bernard Clayton's introduction to bread making. Here are some remarks that tickle me again and again.

"Bread making is not a gentle art, especially when you are kneading by hand. Don't baby the dough! Break the kneading rhythm by occasionally throwing the ball of dough down hard against the table top. Wham! Bam! Don't be gentle with it. Smack it down hard. Let it sound all the way to the living room. Let them know something great is going on! The dough loves it!"

"If the dough you are keading gets stubborn, pulls back, and refuses to be shaped, as is its wont---walk away from it for a few minutes. It will relax, and so will you."

My 43th experiment: kiwi whole wheat bread

My experiment with King Arthur Flour's recipe on whole wheat bread is so memorable that I definitely want to do it again. This time I don't have orange, so I use a kiwi and wonder if that will work. The kiwi in the recipe is not for the flavor, but, like the orange, for removing the bitter taste in the whole wheat flour. As it turns out, I can hardly call it a success. The loaf has a strange sour flavor that I really don't like. I also don't like it that the crumb falls apart easily. Never had such a problem with wheat breads before!

Recipe: kiwi whole wheat bread (1 medium loaf)

Ingredients:
- 3 cups King Arthur whole wheat flour
- 1 tp active dry yeast
- 1 kiwi fruit, crushed and mashed
- 2 TB brown sugar
- 1+1/4 tps kosher salt
- 1 TB vegetable oil
- about 2/3 cup warm water
- 1/2 cup walnuts
- 1/4 cup raw sunflower seeds
- addition 1/2 cup King Arthur bread flour for hydration adjustment of final dough

Procedure:
1. Proof yeast in 2 TB warm water.
2. Peel kiwi fruit and chop. Then mash it into a paste.
2. Mix flour, sugar, and salt in a medium bowl. Use fingers to break the brown sugar crumbs into fine grains.
3. Add proofed yeast and mashed kiwi fruit into the dry ingredients. Add water to hydrate. Stir to form a dough.
4. When the dough is fully mixed, add vegetable oil. Mix it well. Then allow it to rise at room temperature for about 1 hour.
5. Punch down the dough once. Chill it overnight.
6. On the next day, warm the dough on the counter top. Then punch down and add nuts.
7. Pour into a greased pan and allow to rise until volume doubles.
8. Preheat oven to 350F. Bake at 350F, middle rack, for about 40 minutes.

Results:
Day 1, 11:42am, preparing to mix the dry ingredients with proofed yeast and kiwi fruit:

Day 1, 12:02pm, dough almost done, very liquid this time:

Day 1, 12:09pm, dough ready to rise on counter top:

Day 1, 1:03pm, dough risen for 1 hour:

Day 1, 1:04pm, dough being punched down once:

Day 1, 1:06pm, dough ready to chill after being punched down:

Day 2

Day 2, 10:33am, dough warmed up for an hour, ready to mix with nuts:

Day 2, 10:34am, texture of dough:

Day 2, 10:42am, dough after mixing and punching:

Day 2, 10:55am, pan coated with shortening, lined with wax paper, then coated with shortening again:

Day 2, 11:05am, dough to rise in pan:

Day 2, 2:13pm, dough risen, but too moist to stay in shape:

Day 2, 2:38pm, dough being reworked with 1/2 cup of bread flour added:

Day 2, 2:51pm, dough taking on much better shape after re-kneading:

Day 2, 2:51pm, dough's texture after reworking:

Day 2, 2:55pm, dough to rise the second time in before baking:

Day 2, 2:56pm, dough's height before rising:

Day 2, 3:35pm, dough has risen the 2nd time:

Day 2, 3:42pm, dough ready to bake:

Day 2, 3:42pm, dough's height just before baking:

Day 2, 3:56pm, dough baked 14 minutes:

Day 2, 3:56pm, dough's crust cracked after the first 14 minutes:

Day 2, 4:45pm, loaf baked 1 hour and done, rather overcooked:

Day 2, 4:45pm, loaf's top:

Day 2, 4:45pm, loaf's bottom:

Day 2, 4:45pm, thermometer coming out clean:

Day 2, 4:46pm, loaf's height:

Day 2, 4:47pm, loaf's side:

Day 2, 4:47pm, loaf's top when just out of the oven:

Day 2, 5:51pm, loaf's top when cooled, observe the severe wrinkling:

Day 2, 6:04pm, because of the thick overcooked crust, the bread keeps falling apart when being slice. So the loaf is scrubbed of the dark overcooked sides before further slicing:

Day 2, 6:04pm, loaf being sliced after scrubbed of half the thick crust:

Day 2, 6:08pm, loaf yielding only 9 proper slices and some fragments:

Day 2, 6:08pm, end-of-loaf slice:

Day 2, 6:09pm, center-of-loaf slice:


Observations:
1. This time, I added more water than I had planned. But it may not be a bad idea. Since I am using little yeast, it may be meaningful to have a wet dough, which helps the yeast grow.
2. The texture of the dough is rather strange to me on day 2. It seems that very little gluten has developed.
3. I thought the loaf has too much water. So I let it bake for 1 hour. It turns out overcooked.
4. The texture of the loaf is very strange. It literally falls apart when I cut it. I do not understand why. I wonder if the kiwi actually hinders the gluten formation.
5. The bread has a strange sour and bitter flavor which might have come from the kiwi. I actually have noticed this flavor even in the dough right after it's formed. I thought it would go away with the baking. It doesn't.
6. It seems that when the dough has a nice flavor, the resultant loaf will turn out very nice. But if the dough does not taste right, then it's unlikely that the loaf would taste any better.

My husband continues to be encouraging and supportive in times of failure. I am most grateful for him.