Tuesday, March 30, 2010

Cinnamon almond biscotti

Here is my first attempt on biscotti. Among all the cookies, this has the least sugar and fat. I love it.


Recipe: Cinnamon almond biscotti

Ingredients:
- 2 cups unbleached grocery store brand all-purpose flour
- 3/4 cup sugar
- 2 tps baking powder
- 1/2 tp cinnamon
- 1/4 tp salt
- 1 cup dry roasted unblanched whole almonds, unsalted
- 3 large eggs
- 2 tps pure vanilla extract

Procedure:
1. Mix all the dry ingredients except almond, (flour, sugar baking powder, cinnamon, salt) in a large bowl. Mix thoroughly with an egg beater.
2. In a small bowl, mix 3 eggs and the vanilla extract together. Whisk well by hand.
3. Add the liquid mixture into the large bowl and mix until the dry ingredients and the wet ingredients are incorporated. Then add in the almonds and mix. Once the almonds are added, the mixture thickens. Knead the dough in the bowl for 1-2 minutes.
4. Preheat oven to 350F.
5. Turn the dough out onto a work surface dusted with about 1/4 cup of flour. Shape it into two logs of 1" height and 2-3" wide. Transfer both logs onto a cookie sheet lined with parchment paper.
6. Bake in oven for 30 minutes or until the logs are slightly risen and firm to touch.
7. Take the logs out and allow to cool completely, taking about 30 minutes.
8. Use a sharp serrated knife to cut the cooled logs into slices of about 1/2" thick.
9. Reheat the oven to 350F. Place the slices cut side down on the cookie sheet with parchment. Bake for 10-15 minutes, or until the biscotti are crisp and golden. Cool on a rack.
10. Store in airtight containers for up to a month.

Results:

Dry ingredients mixed:

Wet ingredients mixed:

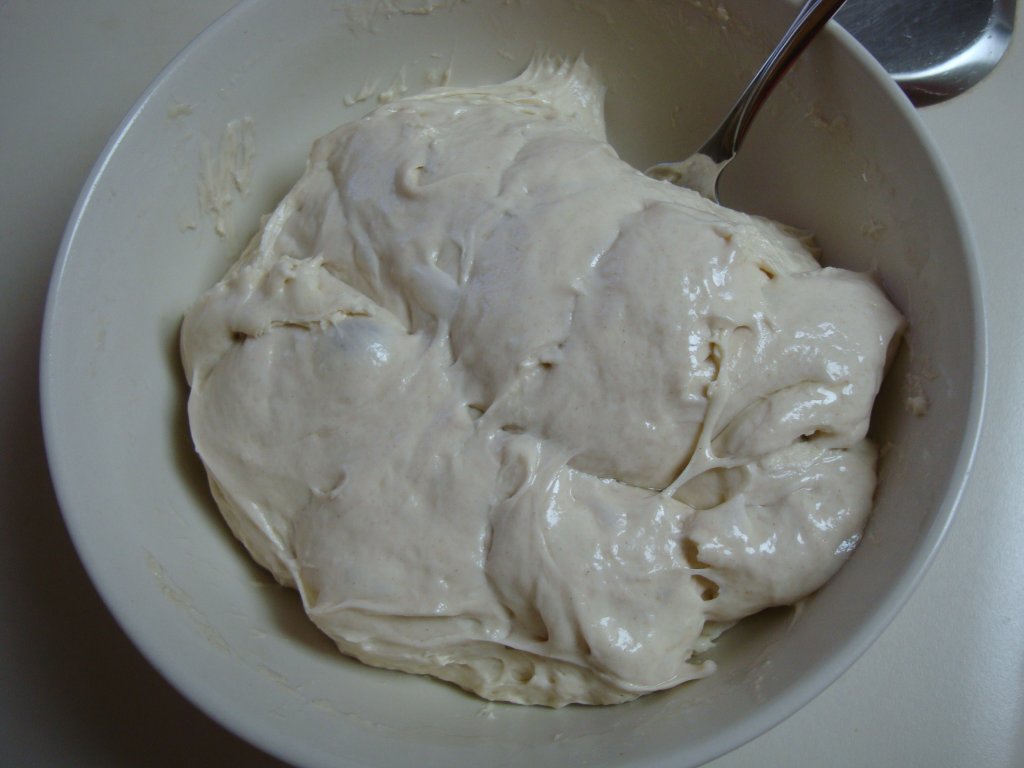
Both ingredients mixed:

Almonds added:

Shaping the dough on the counter:

Two logs made:

Two logs baked the first time for 35 minutes, observe how much the logs have expanded:

Height of a log after baking:

Two logs cooling on rakes. They must have been over-baked a little. The bottom of them (shown in the top log of the picture) is a bit too brown:

Slicing a log after it's cooled. The center of the log is a little soft, but the crust is very hard:

Observe how the log cracks when sliced:

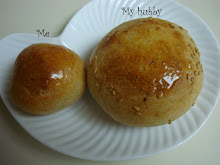
Biscotti after being baked a second time:

Observe the color of the biscotti after second baking. (Right) Before second baking; (Top left) top side of a biscotti after second baking; (Bottom left) bottom side of a biscotti after second baking.


Observations:
1. My first baking time is probably a little too long. The bottom of the logs are too brown. So I need to cut off some of the burnt parts at the bottom of the logs.
2. I cut short the second baking because the first baking has been a little longer than needed.

Saturday, March 27, 2010

My 16th experiment: the very poor man's Brioche

Now I'm moving towards richer breads. My previous improvisons have been so well received that I decide to take on a brioche of my own this time. I'm still very stingy with my use of butter. Oil is something I have not yet learnt to be generous with. This bread is called the very poor man's brioche because of how little butter goes into the dough.


Recipe: Brioche (make 6)

Ingredients:
- 1 cup unbleached flour
- 2 eggs
- 1 TB toasted sesame seeds
- 1/2 tp active dry yeast
- 2 TB honey
- 1/4 stick butter (about 1/8 cup)
- 3/4 tp salt
- 1-2 TB whole wheat flour
- 1/4 of a one-day pre-ferment of 2 cups unbleached flour, 1 tp active dry yeast, 1/2 tp salt and 3/4 cup+2TB warm water
- extra water
- save 1-2 TB of egg white for washing

Procedure:
1. Proof dry yeast in a little water. Mix eggs, sesame, flour, proofed yeast, salt, honey and melted butter. When the mixture is well-mixed, add in the flour and butter. Mix well to form a homogenous dough. Allow to rest in warmed oven for 1 hour or so.
2. Divide dough into small batches and place each in a grease pan with cups. Allow the dough to proof a little more. Brush a wash of egg white on top. 
3. Preheat oven to 450F. Then bake at 400F for about 15-20 minutes.

Results:
Initial rich dough:

Rich dough resting:

Rich dough's gluten strength after resting:

Brioche proofed and ready to bake:

Brioche baked (over baked and egg white gets burnt):

Brioche top look:

Brioche bottom look:

Brioche interior:

A bite of brioche, very lovely, almost like a rich cake:


Observations:
1. The oven spring of these brioches is impressive.
2. The brioches taste a bit more salty than usual. But the texture is the best that I've made so far. The eggs and butter make them taste really great.

My 15th experiment: A bland 2:1 whole wheat loaf

Our sandwich bread runs out so fast, I am now making it every week. Today I tried out the 2:1 whole wheat bread again, with mild variations. Throughout the dough kneading and resting stages, the dough was not very active. So I was suspecting that I'd not get the same big loaf as last time. However, once it entered the oven, the oven spring was spectacular. At the end, I got the same big loaf for the same small amount of yeast. This time, I've forgotten to add the honey and oil, so the crumb is really lean!


A lean 2:1 whole wheat loaf (make 1 standard loaf)
Ingredients:
Overnight pre-ferment (use only half for final dough)
- 2 cups Giant brand unbleached wheat flour
- 1 tp active dry yeast
- 1/2 tp kosher salt
- 3/4 cup + 2 TB warm water
Soaker
- 2 cups whole wheat flour
- 2 TB buttermilk powder
- 3 TB non-fat dry milk
- 1 TB oat bran
- 1 cup water
Final dough
- half of the overnight pre-ferment
- all of the soaker
- a little water if needed
- oat bran for topping
- 1 TB egg white for washing

Procedure:
1. For the overnight pre-ferment, mix all the ingredients using the autolyse method. Allow to chill overnight (for about 10-16 hours). Take the pre-ferment out of the fridge to warm up on the counter at room temperature (72F) about 2 hours before making the final dough.
2. For the soaker, mix all the dry ingredients together in a medium bowl. Then add water to moisten. Stir to form a dough. Then allow soaker to rest. Gluten will gradually develop while resting. Stir every 30 minutes, until up to 2 hours.
3. Add together half the pre-ferment and all of the soaker. Knead with hands to mix the two together as thoroughly as possible. Add water to help integrate if necessary.
4. Place the final dough in warm environment, such as an oven heated up for 10 seconds at lowest setting. Allow the final dough to rest until its volume has increased.
5. Pour the dough into a greased pan. Preheat oven to 400F. Score dough and apply egg wash. Then bake at 350F for 30-40 minutes.
6. Allow to cool and slice up.

Results:

2:13pm, pre-ferment is warming up while soaker is resting:

3:00pm, soaker's gluten is developing:

3:00pm, pre-ferment has been halved:

3:19pm, pre-ferment continues to rise gently:

3:30pm, final dough has been mixed and is ready to rest in warm oven:

4:33pm, final dough poured into loaf pan to proof on stove top with the warmth from baking:

4:53pm, final dough before baking, topped with oat bran and washed with egg white:

5:43pm, loaf baked 40-45 minutes:

5:43pm, loaf's height when just out of the oven:

5:44pm, loaf's bottom:

5:44pm, loaf's side:

5:44pm, loaf's top:

7:13pm, loaf yields 16 slices:

7:13pm, a center-of-loaf slice:

7:13pm, an end-of-loaf slice:


Observations:
1. The oven spring of this loaf is totally impressive, even though the dough has not risen much during the resting and proofing time.
2. I forget to add the honey and olive oil after mixing the final dough. So the crumb of this loaf is drier and less tasty.
3. The extra milk may have contributed to a chewy feel of the crumb.
4. The loaf has a closed crumb. The air bubbles inside the crumb are rather small compared with last time (see my 13th experiment ). However, the height of the loaf is still comparable to the previous 2:1 whole wheat loaf.
5. For this time, I used the oven to bake other loaves before this one. So it's convenient to let this loaf rest on the stove top in the warmth of the oven while baking other loaves. However, the oven may not be as hot as 450F when I bake this loaf immediately after the other loaves are out.
6. When this loaf is done, the temperature registered inside the loaf is 185F.

Friday, March 26, 2010

My 14th Loaves: cheesebreads

This time, I'm trying out the cheese breads again, with the autolysed dough, that has undergone 3 days of retardation. However, due to my shortage of time, I did not give the dough enough time to warm up after chilling. Here are some loaves made from the dough. They are very tasty because of the long fermentation, but do not have a huge oven spring.

Recipe: Cheese breads

Ingredients:
Dough
- 2 cup grocery store brand unbleached wheat flour
- 3/4 cup + 2 TB warm water
- 1/2 tp active dry yeast
- 1 tp coarse kosher salt
- 1/4 cup whole wheat flour
Fillings
- 2 oz cheddar cheese, chopped finely
- 2 tp pesto sauce

Procedure:
Day 1: Prepare dough by autolyse. Allow to chill. Fold dough once every 12 hours or every day.
Day 2: Fold dough once.
Day 3:
1. Take dough out.
2. Dust counter and dough with flour. Then stretch dough on the counter.
3. Cut to 2 pieces. Stretch each piece of dough carefully to a sheet. Spread ingredients on top.
- For small dough, use pesto sauce and sprinkle a little cheese;
- For large dough, use cheese only.
4. Then roll up. Allow to rest until volume has increased to 1.5 times original volume.
5. Bake at 450F for 10 minutes, then 400F for 30 minutes.

Day 1, 12pm, dough prepared by autolyse, ready to chill:

Day 1, 5:32pm, dough after chilling 5 hours:

Day 1, 10:10pm, dough after chilling 8 hours:

Day 1, 10:12pm, dough's texture after chilling 8 hours:

Day 1, 10:13pm, dough's being stretched and folded:

Day 1, 10:15pm, dough ready for 2nd day of chilling:

Day 2, 9:32am, dough chilled for one night:

Day 2, 9:33am, one-day-old dough stretched:

Day 2, 9:34am, one-day-old dough's strength:

Day 2, 9:36am, one-day-old dough folded and ready for another day of chilling:

Day 3: 10:51am, two-day-old dough:

Day 4, 8:49am, three-day-old dough:

Day 4, 8:53am, texture of three-day-old dough:

Day 4, 8:59am, dough being worked on the counter without warming up:

Day 4, 9:01am, dough easily cut into two pieces:

Small loaf
Day 4, 9:06am, small dough being filled with 2 TB pesto, dash of cheese and rolled up:

Day 4, 9:07am, small dough's size after rolling up:

Day 4, 9:28am, small dough resting:

Day 4, 9:56am, small dough resting over 30 minutes:

Day 4, 10:07am, small loaf baked 10 minutes, browned but not well cooked inside:

Day 4, 10:42am, small loaf baked 40 minutes, nicely browned and well cooked:

Day 4, 10:42am, small loaf top:

Day 4, 10:50am, small loaf sliced:

Large loaf
Day 4, 9:28am, large dough being stretched:

Day 4, 9:30am, large dough rolled up with cheese pieces:

Day 4, 9:30am, large dough resting:

Day 4, 9:57am, large dough rested 30 minutes:

Day 4, 10:42am, large loaf baked 40 minutes:

Day 4, 10:43am, large loaf's top:

Day 4, 10:43am, large loaf's bottom:

Day 4, 10:43am, large loaf's height:

Day 4, 4:08pm, large loaf sliced:

Day 4, 4:08pm, large loaf's center slices:

Day 4, 4:09pm, large loaf's end slice:

Observation:
  1. This time, I try out baking the loaves for a longer time to observe what I would get. The results are very nicely browned loaves. The small loaf has olive oil in it, which makes it very good especially after baking for a long time. The large loaf is very lean. So it does not seem to benefit as much from the high temperature baking.
  2. The cheese cubes in the large loaf melts to give the big holes. The lean loaf might benefit from a little more salt since it does not have the complex taste of whole wheat flour and other ingredients.
I gave the small loaf out at work. It's been very well-received.