
Recipe: Wheat berry bread (make 1 round loaf)
Ingredients:
Soaker
- 3/4 cup cooled wheat berries, cooked until all the grains are opened
- 1 cup grocery store brand whole wheat flour
- 1.5 TB sour milk powder
- 1/2 tp salt
- 1/2 cup + 2 TB water
Biga
- 1.5 cup unbleached flour
- 1 tp yeast
- 3/4 cup + 2 TB warm water
Final dough
- 1/2 cup unbleached flour
- 2.5 TB honey
- 1-2 TB oil
Procedure:
Day 1
1. To make the soaker: mix the salt, sour milk powder and whole wheat flour. Add in the wheat berries. Then add water and stir until the mixture becomes a moist dough.
2. To make the biga: dissolve 1 tp yeast with 2 TB warm water. Then add the dissolved yeast to the unbleached flour. Keep mixing the flour with water until it becomes a smooth dough. It's fine to be on the moist side, but not to the extent of becoming a poolish.
3. Chill both the soaker and biga overnight until needed.
Day 2
1. Take the biga and soaker out to warm to room temperature for about 2 hours.
2. In a large bowl, mix the biga and soaker. Sprinkle flour while mixing, using up to 1/2 cup. Knead the dough to develop strength after the ingredients are well mixed. This time, the dough should be very moist and sticky. Possibly not easy to handle by hand.
3. When kneading is complete, add honey and use hands to rub the honey into the dough.
4. Pour oil into a medium bowl. Place the dough into the bowl and roll it a little to coat with oil. Then allow the dough to rest until its volume has increased to 1.5 times.
5. Meanwhile, preheat oven to 400F.
6. Place the sticky dough in a pan, top with oat bran, and moisten the toppings a little. Then bake at 350F for about 40 minutes. Because this dough is very moist, it may take longer to bake. If the surface of the bread becomes too brown, cover with foil and continue baking.
Results:
Day 1
8:28pm, biga and soaker prepared to be chilled, both are rather moist.

Day 2
2:14pm, biga and soaker are taken out of the fridge to be warmed up before mixing the final dough:

5:58pm, final dough has been prepared and allowed to rest at room temperature. Its texture is rather rubbery. Sufficient gluten has developed to make it strong. But it's not dry enough to be shaped by hand. It's allowed to rest only once, and then poured into a pan for baking. Minimal handling is done on the dough. Scoring isn't quite possible at this point because of the stickiness of the dough. So it's done after the loaf is a little baked in the oven.

5:58pm, height of the final dough before baking:

After 8 minutes, the loaf is scored. At this point, the surface has already formed a thin crust, but the interior is distinctively moist.
20 minutes into baking, I cover the top of the loaf with foil to prevent over browning.
30 minutes into baking, I remove the foil and test the loaf. The center is still a little sticky.
The loaf is allowed to bake for another 10 minutes uncovered.
6:50pm, loaf baked for 40 minutes:

6:50pm, loaf's height when freshly out of the oven:

6:52pm, loaf's side:

6:52pm, loaf's bottom:

6:54pm, the penalty of an ungreased pan:

7:20pm, the texture of the crumb at the center of the loaf:

7:21pm, observe the softness of the crumb when sliced. The loaf has a very nice hard crust, but the center is still a little moist, and sticky to the knife. So, slicing needs extra care. The crust of some slices break at the top because of the pressure of the knife.

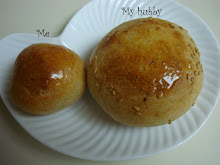
7:26pm, one loaf yields 12 big slices:

7:28pm, observe the texture of a center-of-loaf slice (the long slice) and that of an end-of-loaf slice (the short one on top). The large holes tend to distribute closer to the edge than to the center. I guess this is because of the weight of the loaf.

Comments:
1. In this experiment, I am using less flour and less yeast. In total the amount of flour is only 3 cups instead of the 3.5 cups used for large sandwich loaves. I also reduce the amount of yeast to just 1 teaspoon, and add it all to the pre-ferment.
2. The liquid level in this dough is a little too high, making it a bit sloppy. I think, round loaves need better shapes and so they should not be too hydrated.
4. For some reason beyond me, this loaf smells buttery when baking, though I have not used any butter!
5. This loaf surprises me pleasantly by its large holes. I was expecting it to be heavy because of the small amount of yeast and the poor gluten development due to the hydration. But it turns out to be really soft, light and with large holes. It means that the loaf has developed strong gluten to capture the CO2, and the small amount of yeast has been very active during the overnight fermentation.
I have gone this far, from making inedible brick-like white sandwich loaves, to improvising wonderful whole wheat round loaves. I used to think that baking is too hard for me because I'd never seen it done. But time has shown otherwise. My husband's day-to-day support has made a miracle in my baking. I thank him for gracefully enduring my first few failures. Love perseveres.
No comments:
Post a Comment