
Ingredients:
Poolish (make about 1.5 cup)
- 1 cup unbleached wheat flour
- 1/2 cup water
- 1/4 tp yeast
Almond bean paste
- 1 cup cooked red beans
- 1/2 cup water from cooking the red beans
- 1/4 cup almond meal
- 1/4 cup glutinous rice flour
- 1 TB + 1 tp brown sugar
- 1/2+1/4 tp salt
White dough
- about 1/2 to 3/4 cup of poolish
- 1 cup unbleached wheat flour
- about 1/2 to 1/3 cup warm water
- 1 tp active dry yeast
- 1/4 tp salt
- 2 tp oil
Procedure:
For the almond bean paste
1. Blend red beans with the water from cooking the beans in a blender until they turn into a thick paste with small grains.
2. Add almond meal and mix well. Then add brown sugar and salt to taste.
3. When the paste has the desired flavor, add up to 1/4 cup of glutinous rice flour to thicken the texture. It introduces a floury flavor. Stir until the mixture is uniformly thick. Chill until use.
For the white dough
1. Proof dry yeast with a little warm water. Mix flour with salt in a large bowl.
2. Add poolish, yeast and flour to the large bowl. Use a spoon to stir until it forms a dough. Add water gradually while mixing the dough.
3. After the dough has formed and kneaded for 10 minutes (or until the texture is smooth and gluten has developed), rub in up to 2 tp of oil.
4. Heat an oven for about 15 seconds at 150F. Then allow the dough to rest until it has expanded to 1.5 its original volume.
For the final roll
1. Punch dough down. Knead for a few more minutes. Then roll out on the counter dusted with flour. After rolling out to about 1/3" thick, allow it to rest for a minute or two. Then spoon the almond bean paste onto the dough sheet. Roll the dough back into a roll.
2. Grease a baking pan. Place the roll of dough into the pan and allow to rest in warm oven (slightly below 150F) until it has expanded again (this time may not be 1.5 times its volume because the filling which occupies almost half the volume, does not have yeast and is very dense, it puts weight on the layers of white dough).
3. Preheat oven to 450F.
4. Before baking, moisten the top of the roll with some water. This prevents the surface from drying out too fast (so that the interior could expand). Water also gives the surface a nice browning effect. Bake at 350F for 20-25 minutes.
Results:
2:12pm, poolish and bean paste just taken out from the fridge, both having been chilled for 24 hours:

3:46pm, poolish and bean paste after 1 hour 30 minutes of warming up:

3:46pm, poolish activity:

4:27pm, bean paste texture:

4:27pm, white dough texture after kneading:

4:39pm, white dough rested 12 minutes:

4:45pm, white dough punched down:

4:49pm, white dough rolled out after punched down:

4:51pm, white dough with filling:

4:56pm, roll preparing to proof:

5:32pm, roll covered with plastic (this is important to prevent the surface from drying out) and proofed 36 minutes in warm oven:

5:32pm, roll's height just before baking:

6:00pm, roll baked 23 minutes:

6:00pm, bottom of baked roll:

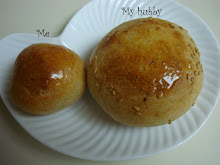
6:01pm, top of baked roll:

8:24pm, an end-of-roll slice:

8:25pm, a center-of-roll slice:

Observations:
- On the whole, the roll turned out satisfactory. The flavor of the white part was great. The bean paste was good too.
- I was expecting the bean paste to be more solid than what I'd got here. It seemed that the glutinous flour did not serve the purpose I had wanted it to serve. Maybe I could drop it all together next time then.
- The paste took up a substantial portion of the roll. Therefore the roll was really heavy. The white dough trapped between layers of bean paste was not able to expand much, even though a cross section of it showed that these layers were cooked.
- If the bean paste would not solidify as the dough no matter what I do, it would mean that the bean paste could only be used as a filling, not a bread material. In that case, I might simply need to reduce the amount of paste used in a roll.
- The light brown color of the crust was beautiful. That's most likely the effect of the water.
- I noticed cracks on the crust of the roll, which may indicate that the surface was hardened before the interior could expand.
- I also notice that the loaf has detached from the side of the pan when it's done. It happens sometimes, especially when the dough is not too watery. I have yet to figure out why.
- One very positive side about this loaf is that, 4 hours after baking, the interior of the roll (confirmed to be fully cooked) remains very moist. This is obviously because of the moisture from the bean paste. As a result, the layers of white bread between the bean paste remains very moist even when it's left on the counter at room temperature. The outer layer, however, dries out like any white bread, shortly after baking. This says something about preserving the moisture of bread (though the exact chemistry of staling is not because of evaporation.
- Since the roll remains very moist at room temperature, I think it's actually wise to freeze it to prevent molding.
- I am pleasantly surprised by how nice this bread tastes when it is taken out of the freezer and toasted the next day. The crust becomes lightly golden and crispy. The crumb remains soft and moist.
To do:
- I'm going to study how to handle fillings in a roll.
- Next time when I try out a roll, it may be better to use fillings of lower density (ie. lighter weight), such as a beer bread with cheese and pesto sauce.
No comments:
Post a Comment