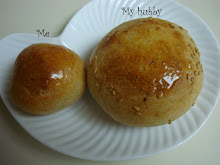
Being absolutely determined to get it, I start my bread baking lesson on "back to basic". Here is my first white loaf, following a new baker's primer on the web called Your first loaf .
Recipe: My first white loaf (make 1 loaf)
- 3 cups unbleached all-purpose grocery-store brand flour
- 1+1/8 cup water, warm enough to nearly scald the hand
- 2 teaspoons kosher salt
- 2 teaspoons active dried yeast
Procedure:
1. Mix yeast with flour in a large bowl.
2. Dissolve salt in 1 cup of water. Then pour into bowl and mix with flour. Form a sticky mass. When most of the flour has incorporated into a mixture, add the remaining 1/8 cup of water if necessary.
3. When the dough start cleaning off the bowl, put it on the counter and start kneading. The dough should be very smooth. The warm water gives the yeast a good temperature to start working.
4. Knead for 10 minutes or so. The dough becomes elastic and warm.
5. Set aside in a greased bowl. Covered with damp cheese cloth, and then a dry towel to keep warm on the counter. Room temperature is about 69-70F.
6. The first rise takes 45 minutes to 2 hours for the dough to double. Punch it down and gently fold it. Dough has now a different texture from before rising.
7. The second rise takes about 45 minutes to 2 hours also for the dough to double its volume.
8. Shape dough into a long roll and set it in a greased loaf pan. Allow to rise to double before baking.
9. Preheat oven to 375F. Brush an egg wash of one beaten egg on top. Then bake in middle rake for 35 minutes.
10. Allow to cool for 30 minutes. Slice, serve and freeze the remainder right away.
Result: Here is my tracking of the process.
12:29pm: The dough needs no extra water or flour. It starts to clean off the bowl and the hand after a few minutes of kneading.
12:33pm: The texture of dough when stretched
12:35pm: Preparing dough for first rising. Pay attention to the size.
12:36pm: Covering dough with warm damp cloths for first rising
1:55pm: Dough has doubled its size after a little more than 1 hour
1:57pm: Dough is punched down and kneaded again.
1:57pm: Dough preparing for 2nd rising
3:16pm: Size of dough has not doubled after 1+1/2 hours of 2nd rising
4:40pm: Dough finally doubles its size after 3 hours of 2nd rising. It has a distinctive smell of fermentation.
4:58pm: Texture of dough just before shaping
5:05pm: Folding dough to avoid destroying all the bubbles
5:06pm: 1/2" big gas bubbles that still remain in dough after folding
5:12pm: Dough set in baking pan for proofing
5:12pm: Height of dough before proofing
6:16pm: Dough after 1 hour of proofing
6:16pm: Height of dough after proofing
6:28pm: Applying egg wash to dough just before baking
6:29pm: Height of dough just before baking
7:03pm: Loaf comes freshly out of the oven
7:03pm: The other side of the loaf when it comes freshly out of the oven
7:04pm: Bottom of the loaf when freshly out of oven
7:04pm: Height of loaf when freshly out of the oven
7:04pm: A sideway view of the loaf when it just comes out of the oven. When knocked, the loaf does not sound quite hollow, but there is some faint echo.
7:46pm: Loaf allowed to cool for 30 minutes and then sliced
7:47pm: A detailed look of the texture of the loaf after slicing
Remarks:
The result of this experiment is very good on the whole. This experiment is simple enough that I can observe the stages very carefully.
- I used a new bottle of instant dried yeast. That may be why the dough rises well.
- I kept the dough on the counter at room temperature, about 69-71F. The 1st rising was much faster than the 2nd, possibly because of the warm water used when making the dough. During the 2nd rising, the bowl and the cloth were a little cold to the hand after a few hours on the counter. That may be why the dough rose slowly. There was a distinctive smell of fermentation during the 2nd rising.
- Dough folds very neatly after the 2nd rising. I shaped the dough gently in order not to destroy all the bubbles. Dough continued to grow while proofing. It did not get out of shape. Throughout the whole process from kneading to proofing, no additional water or flour was needed.
- I did not score the loaf, thinking that it would not be necessary in a pan. Unfortunately, I was wrong.
- The holes in the bread were a bit smaller than I expected, considering the effort I had made to let it rise twice, and to fold it gently. I might have taken too long to fold (about 5-10 minutes).
- The bread tasted plain, but was good with butter. The crust already started to stale 30 minutes after it comes out of oven.
At the end of the day, my greatest joy is that my dear husband is willing to help me consume this loaf through the rest of the week. It's his support that encourages to press on for excellence. In my next experiment, I will use warm milk to substitute the water. Or I might try an overnight fermentation with the same ingredients. We'll see.


Dough: Yummy! Successful experiment. :)
ReplyDelete